Appearance
Create a role and set its permissions
A role is a set of permissions. You give each user one or more roles, and they can do what any of their roles allows. Create one role per job, for example Cashier, Accountant or Delivery Driver, rather than one per person.
Each row of the permission matrix is one part of the app, for example Orders. Its columns are:
| Permission | Allows |
|---|---|
| Read | Seeing the list and the records |
| Create | Adding new records |
| Update | Editing, and the workflow steps: confirm, post, cancel, void, ship, deliver, receive, return |
| Delete | Deleting records |
| Manage | All of the above |
Without Read, the menu item is greyed out. Without another permission, its buttons are greyed out.
Who can do this: Anyone whose role can create roles, usually an Administrator.
Step by step
Go to Administration › Roles. The list shows each role and how many permissions it has.
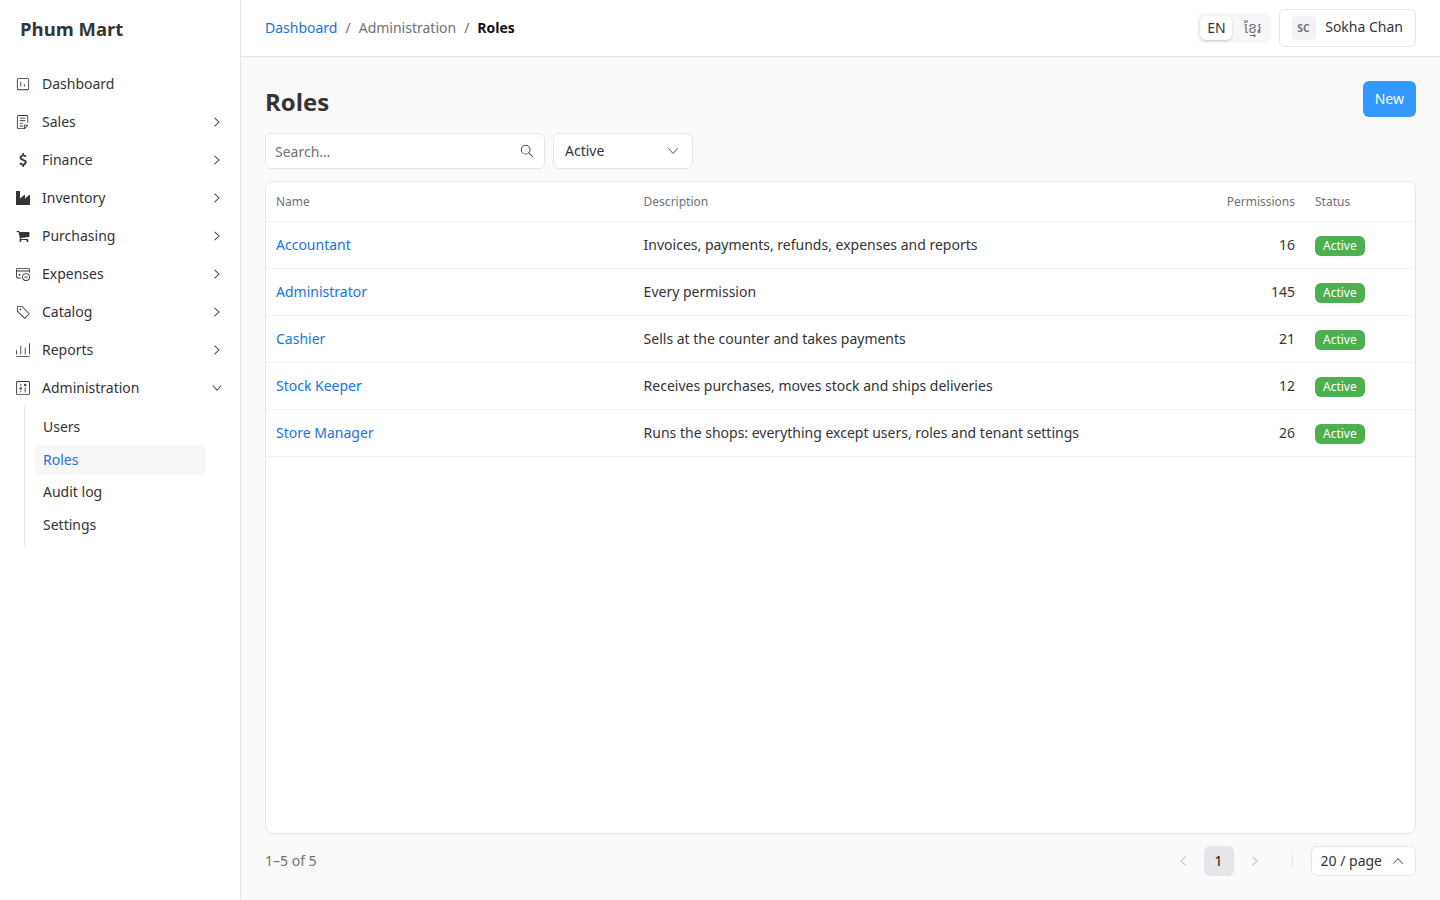
Click New.
Enter the role's Name, for example Delivery Driver, and a Description of the job.
In the matrix, tick what the role can do. For example, Manage on Deliveries, and Read on Orders and Customers. Ticking Manage ticks the whole row.
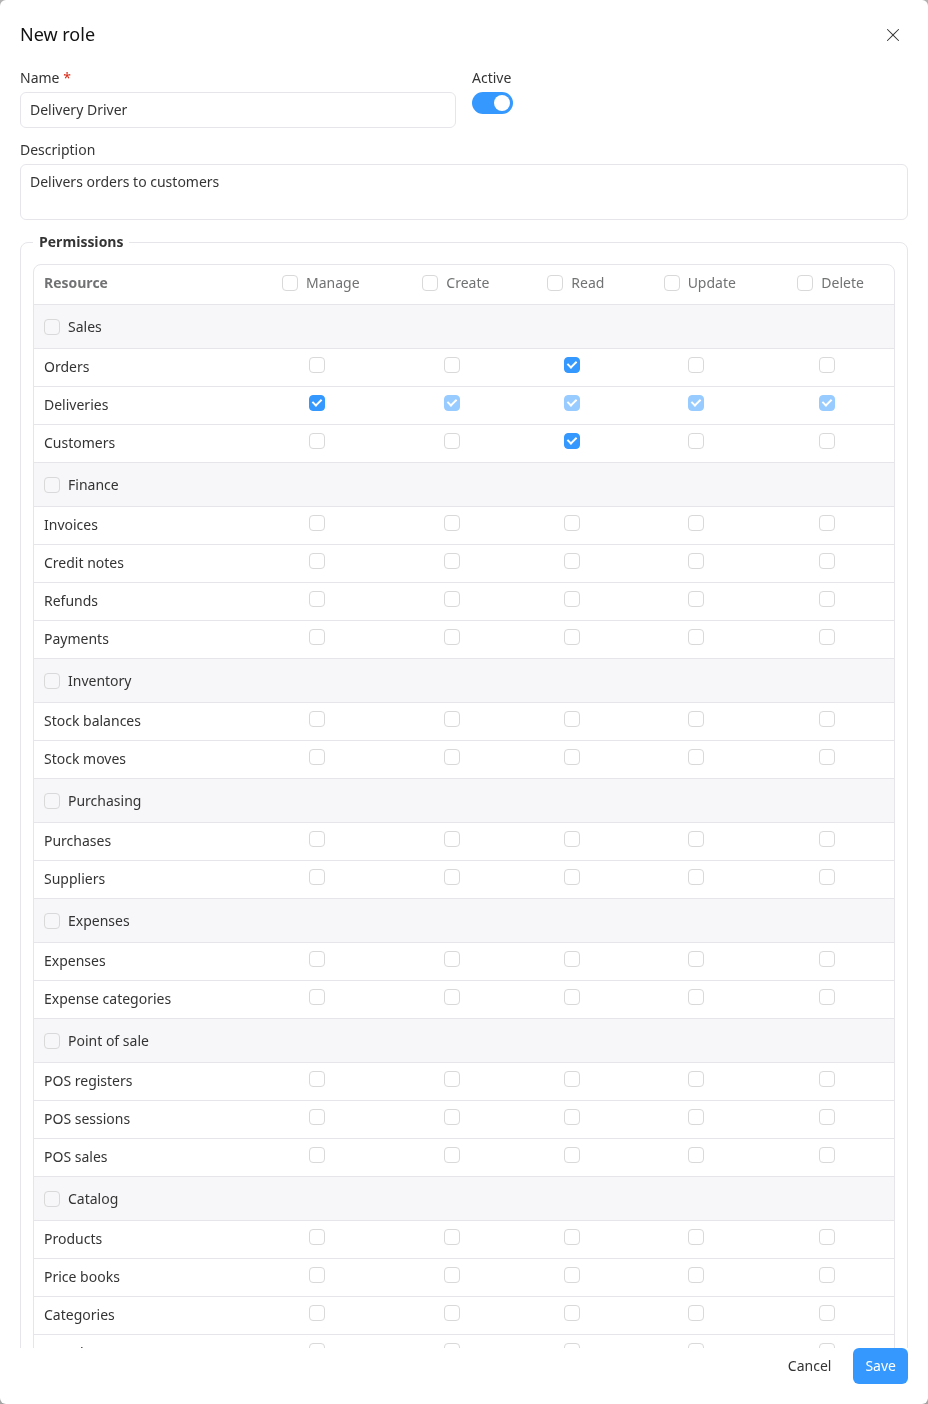
Click Save. The role opens, with its permissions.
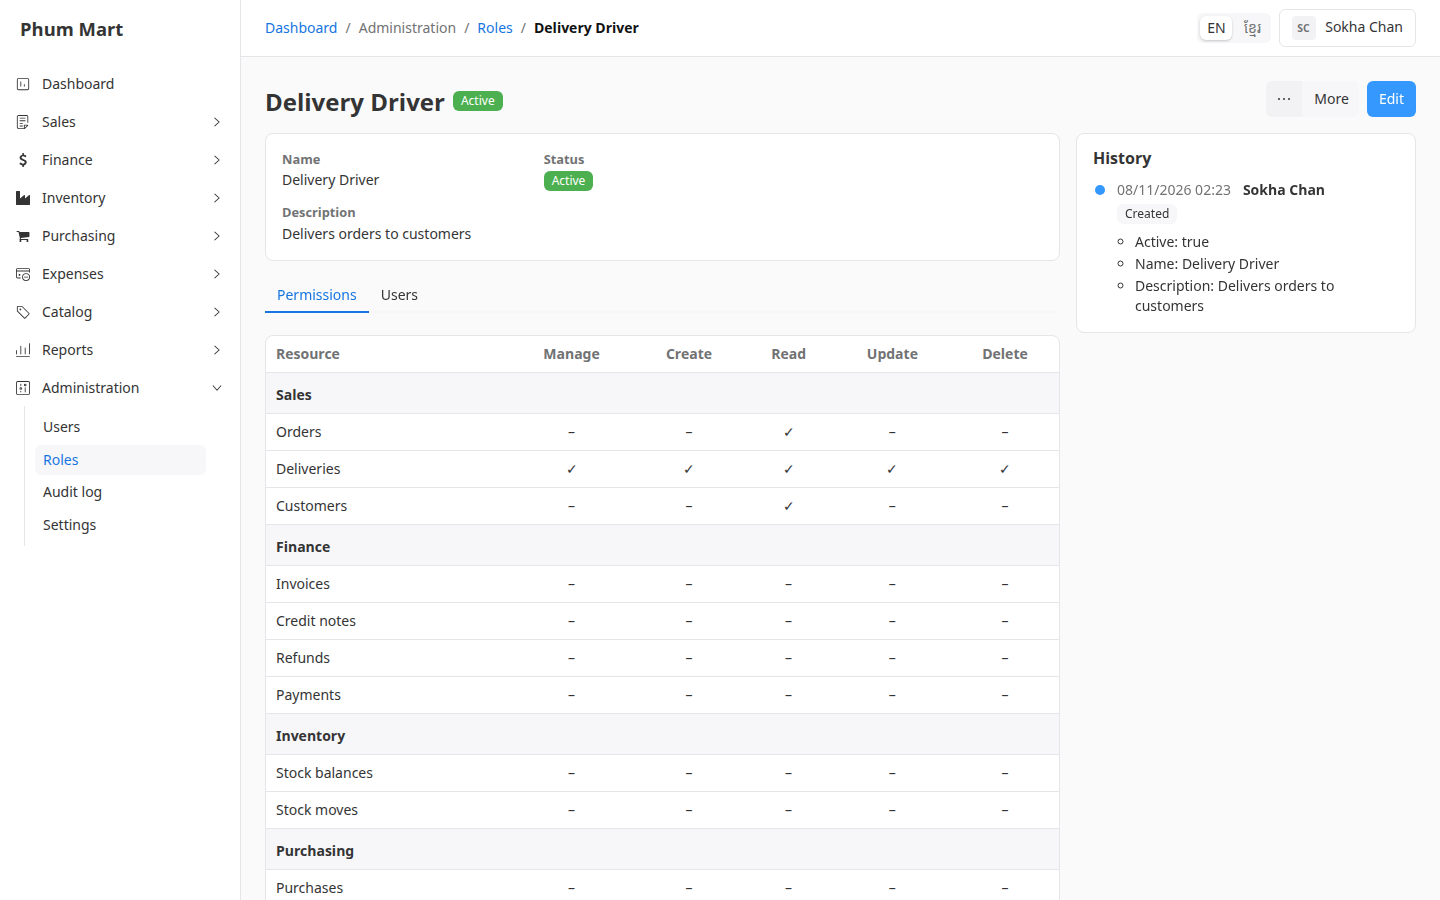
Next, give the role to users.
Tips
- Start small. Give the permissions the job needs, and add more when someone needs them.
- Reports have their own rows: Sales reports for sales figures, and Financial reports for receivables, stock value and profit.
- Point of sale: selling happens in the POS app. POS registers: Update also lets cashiers change prices and discounts at the till.
Having trouble?
- A message says the role already exists: choose another name.
- A new part of the app is missing from an existing role: new permissions, such as Credit notes, aren't added to existing roles automatically. Edit the role and tick them.
Related
- Manage roles
- Add a user
- Find your way around the app: what greyed-out items mean