Appearance
Set up a POS register
Summary
Add a till to a shop, with its prices and what's printed on its receipts.
Description
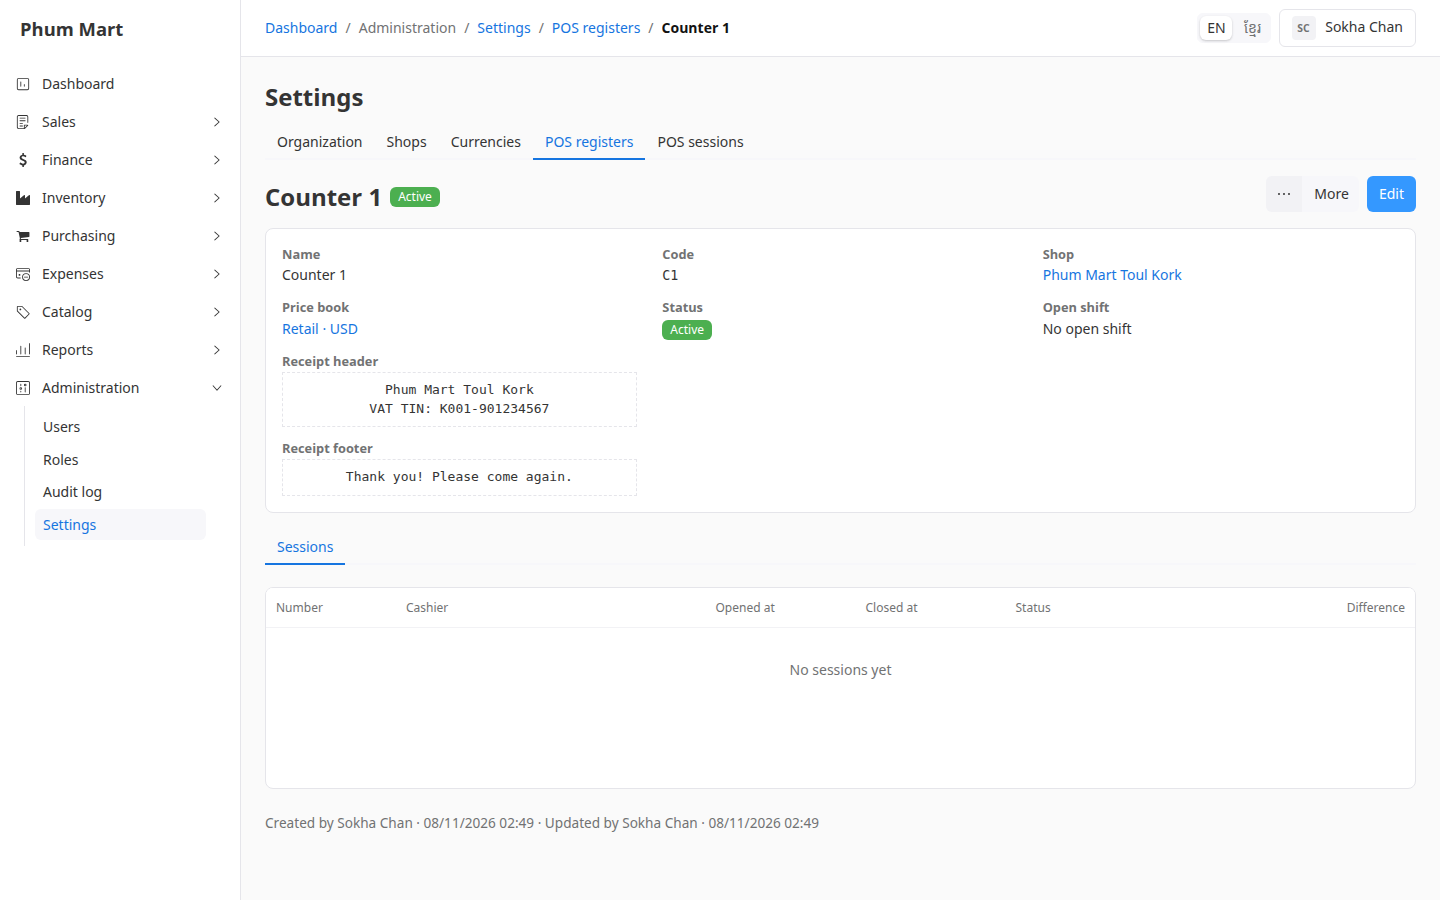
A register is one till at one shop. Cashiers sell on it in the POS app, the separate till program. This back office is where you set the registers up and check their shifts. Each register has:
- A Shop: its sales take stock from this shop.
- A Price book: it sets the prices and currency of the till's sales.
- A Receipt header and footer: printed on every receipt, for example your VAT TIN and a thank-you message.
Who can do this: Anyone whose role can create POS registers, such as a shop manager.
Step by step
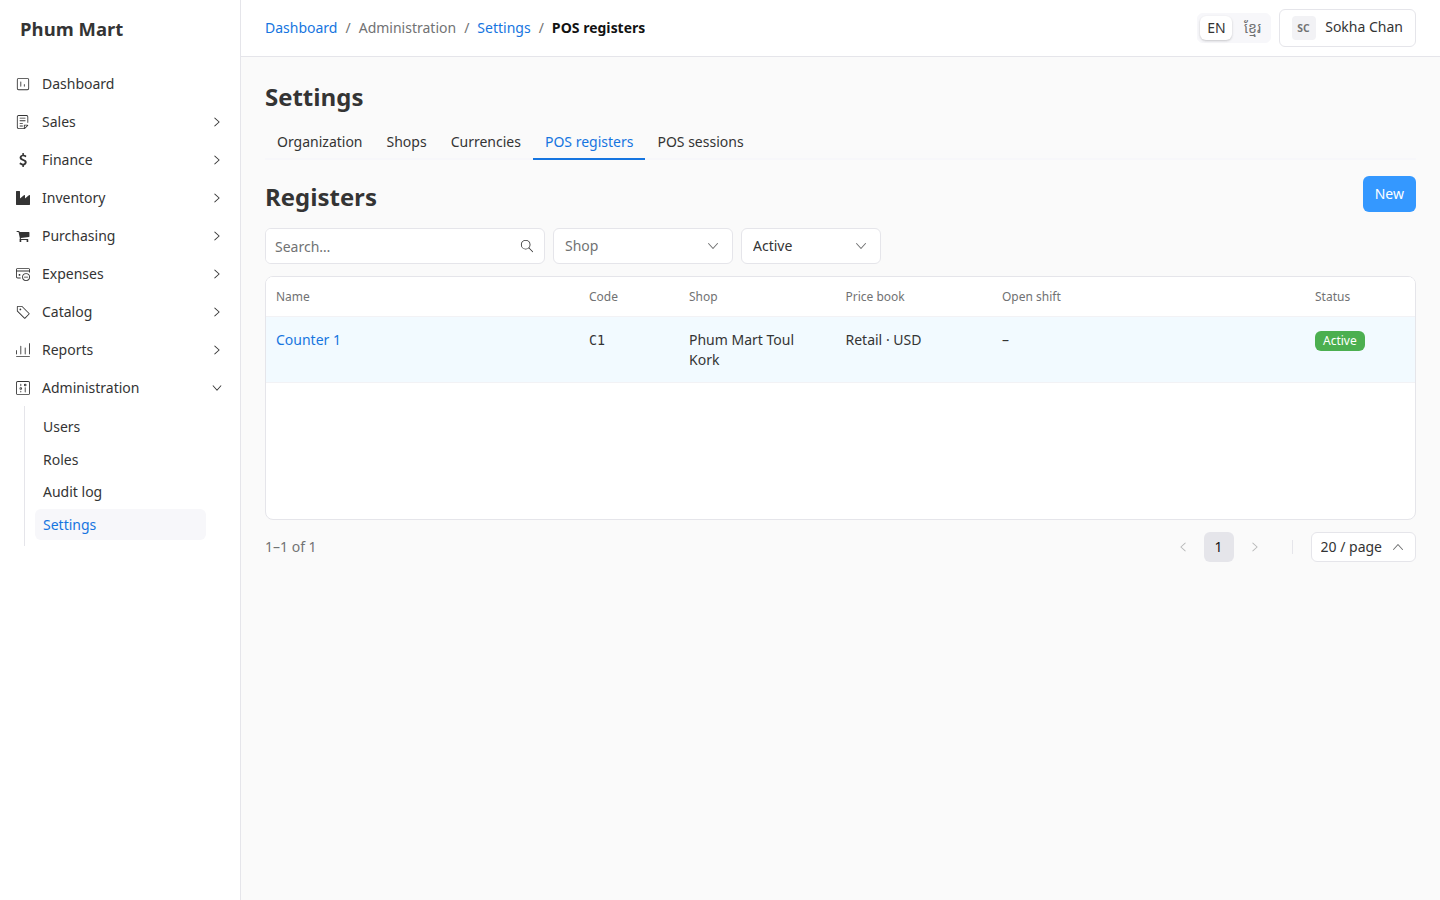
Go to Administration › Settings and open the POS registers tab.
Click New.
Enter the Name, for example Counter 1, and a short Code, such as
C1. The code is printed on receipts.Choose the Shop and the Price book.
Type the Receipt header, for example the shop name and VAT TIN, and the Receipt footer.
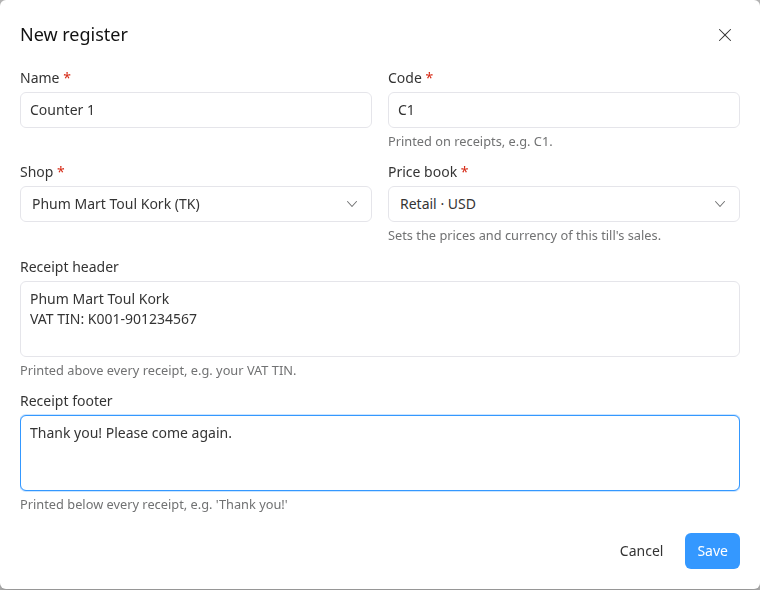
Click Save. The register is listed, with its shop, price book and any open shift.
Set the till up in the POS app for this register. See the POS app's own guide.
Click a register to see its details and its Sessions (shifts).
Change or close a register
- Edit changes its details. While a shift is open, the shop, price book and status can't change: close the shift first.
- More › Deactivate stops it being used. More › Delete removes a register that was never used.
- More › History shows who changed it and when.
Having trouble?
- Shop, Price book or Active are greyed out: a shift is open on the register. See Close a forgotten shift.
- Cashiers can change prices at the till: that's allowed by the POS registers: Update permission. Remove it from their role if they shouldn't. See Create a role and set its permissions.