Appearance
Search and filter lists
Every list, such as Orders or Invoices, has a search box and filters at the top. The list updates as soon as you change them. The page address keeps your search and filters too, so you can bookmark the page or send the link to a colleague, and they'll see the same list.
Who can do this: Everyone who can open the list.
Step by step
Open a list, for example Sales › Orders.
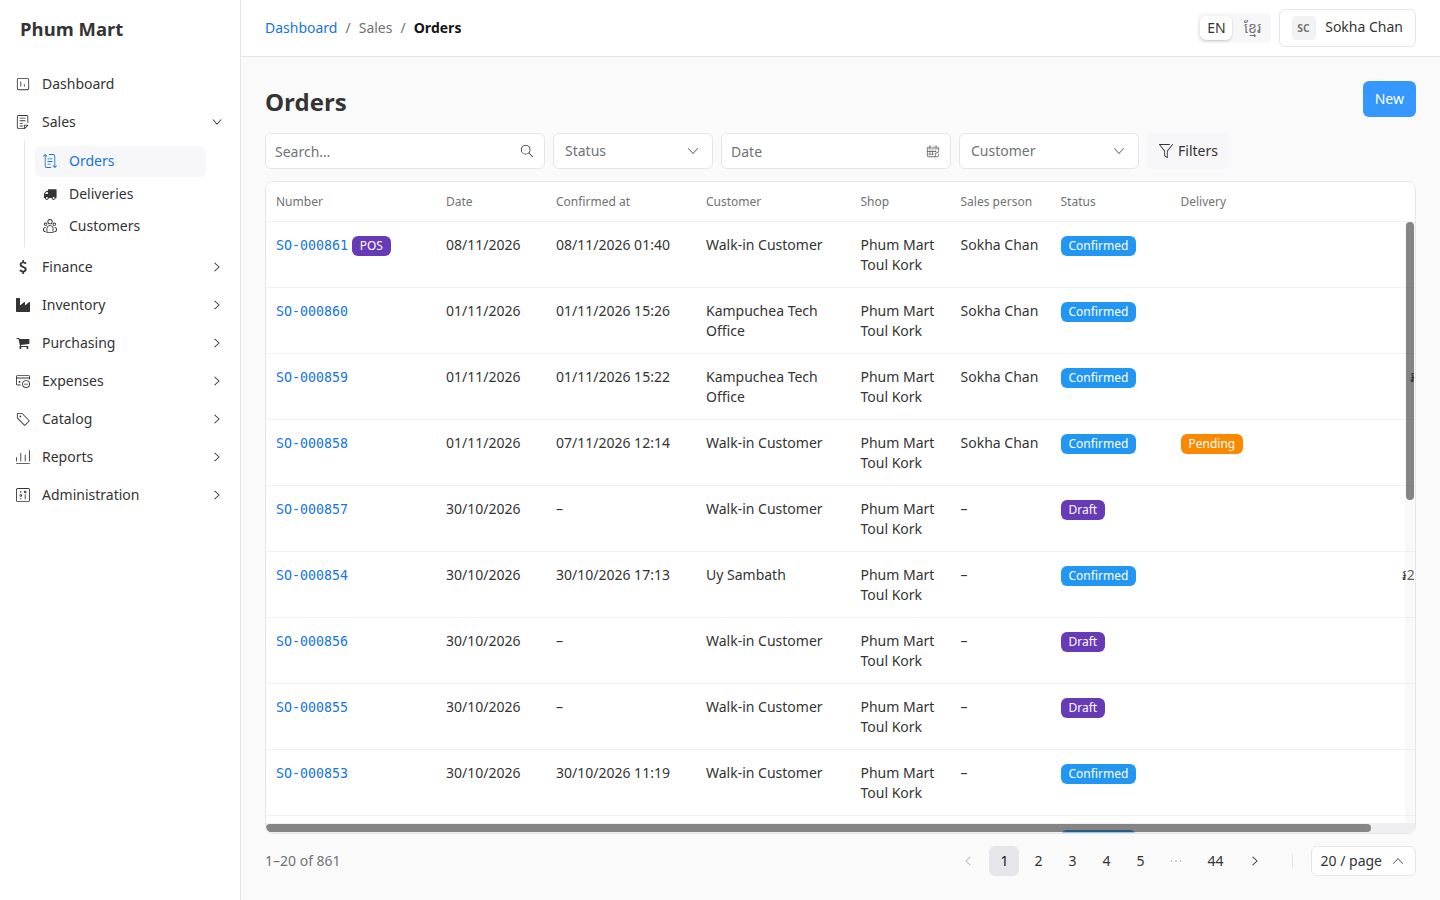
To search, type in Search…: for example, a document number, a customer name or a phone number. The list updates as you type.
To filter, use the boxes next to the search, such as Status, Date or Customer:
- Status lets you tick several values, for example Draft and Confirmed.
- Date takes a range. Pick the first and last day, or a shortcut such as Last 7 Days. Both days are included.
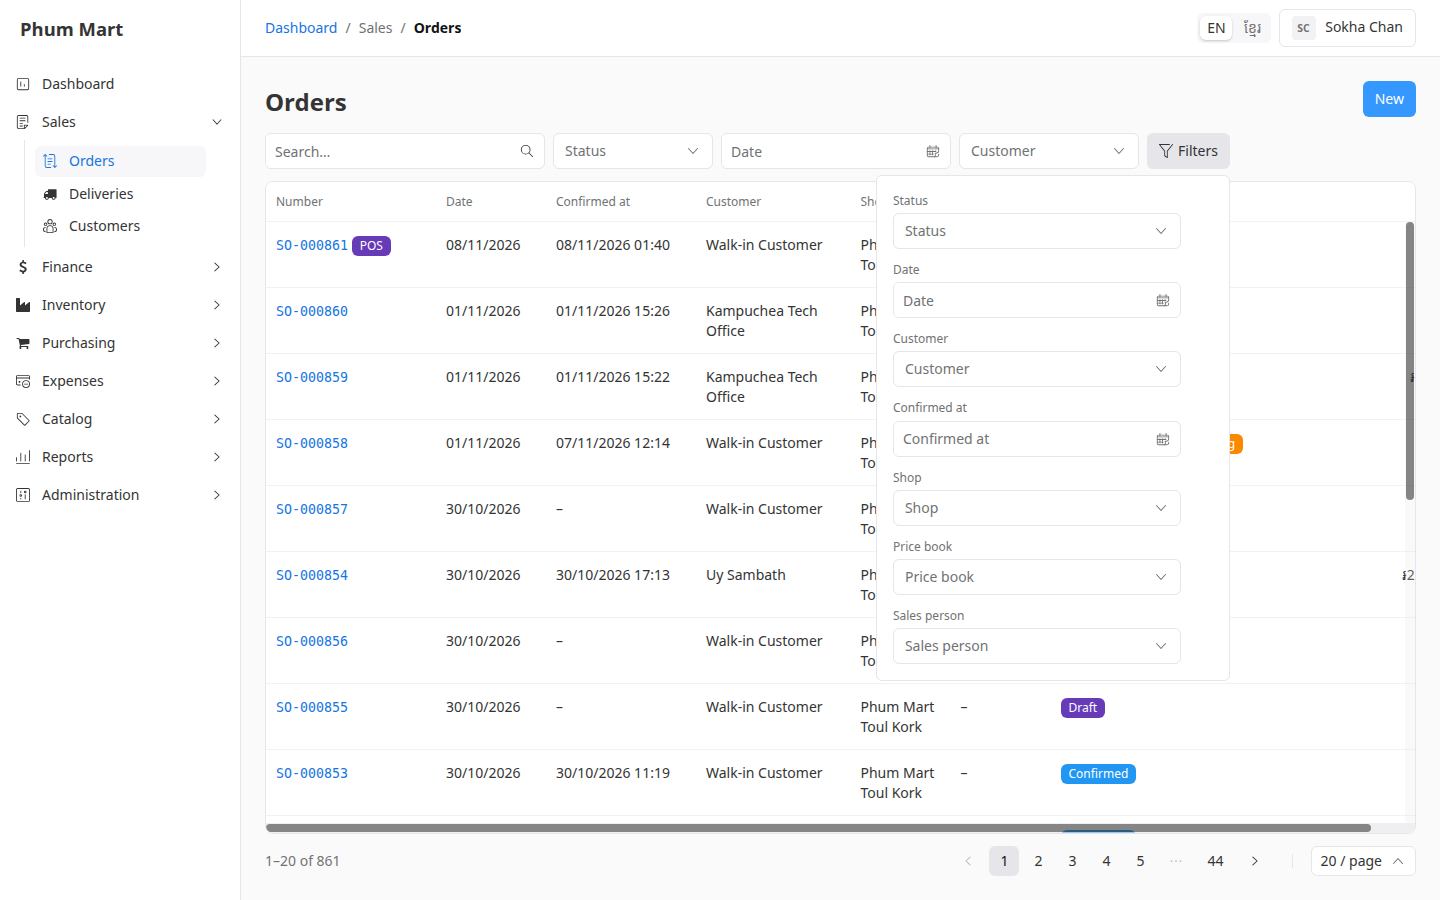
For more filters, click Filters. The panel shows every filter of the list, including the ones on the bar. Picking a value doesn't close it. Click elsewhere on the page or press Esc to close it.
Check the row under the bar: each filter you set shows there, for example Status: Confirmed. The number on Filters counts them. Click ✕ on one to remove only that filter, or click Reset to clear them all.
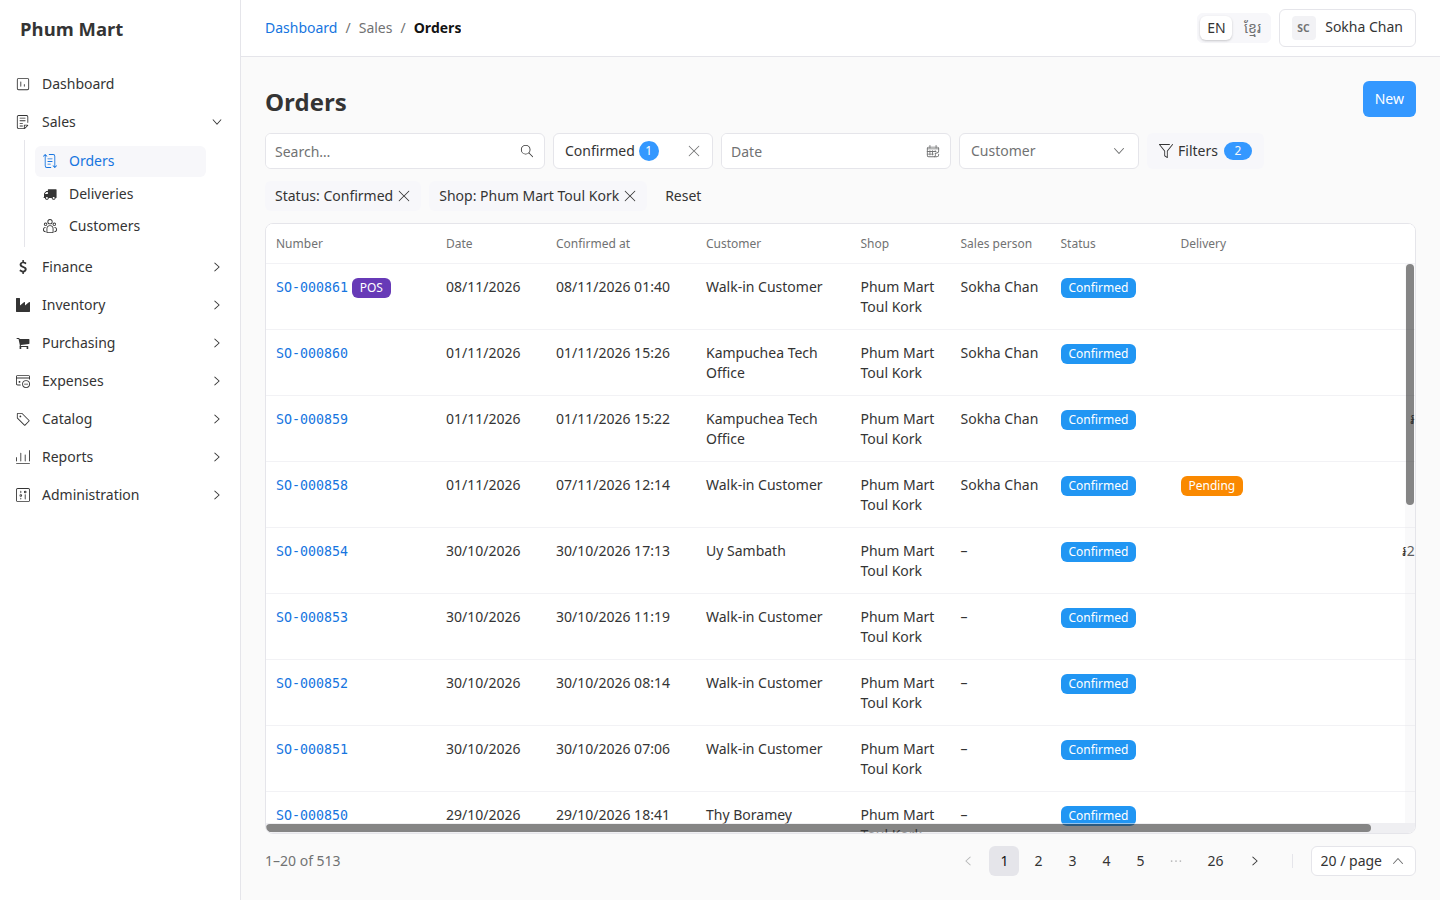
At the bottom, use the page numbers to see more results, and choose 20, 50 or 100 rows per page.
Tips
- Unpaid invoices have a shortcut: the Unpaid + partially paid switch on Invoices. See Find unpaid invoices.
- Links from the dashboard open a list with its filters already set.
- Going back keeps your filters: after you open a record, click the list's name in the breadcrumb, for example Orders.
Having trouble?
- "No results": a filter may be too narrow. Check the row under the bar and click Reset.
- Something is missing from a list of products or customers: these lists show active records only. Set the Active filter to Inactive to see the others.